
Use Expert mode for advanced options
The advanced capture settings let you adjust the screenshot to your needs. They're often used to click away or hide cookie alerts and other pop-ups. Some of them call for a bit of web development know-how.
Where to find the settings
Add or edit a webpage and you'll see two tabs: Basics and Advanced settings.
On the Basics tab, below the URL, title and capture schedule, you'll find:
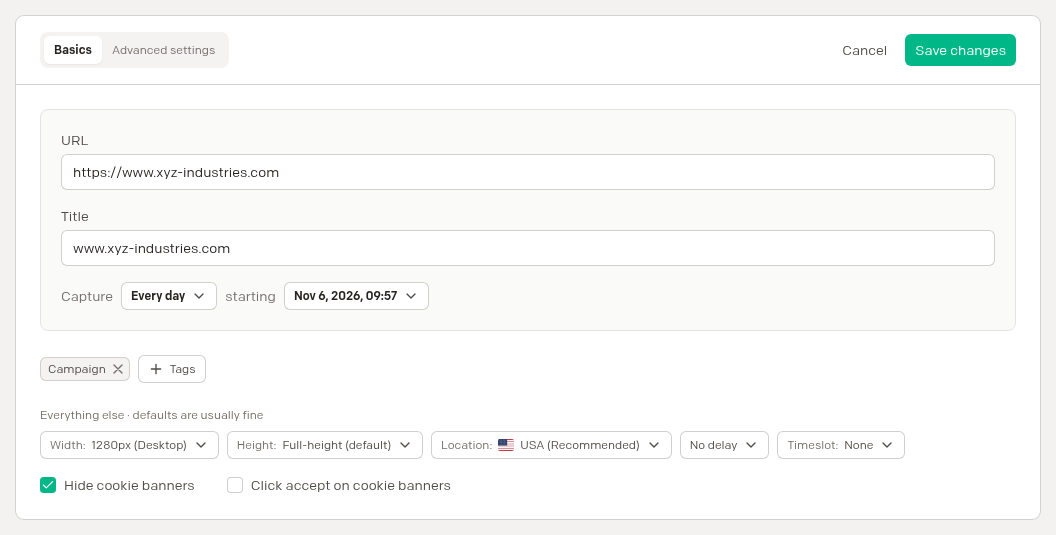
- Width: the width of the screenshot (in px). Choose a smaller width to get the mobile or tablet version of a page (if available).
- Height: the height of the screenshot (in px). Full-height (default) works fine for most pages and captures the whole page, up to 30,000px. You can also choose a fixed height.
- Location: the GEO-IP location the screenshot is taken from.
- Delay: a big or complex page may need more time to load. We capture the page when the web server says it has fully loaded, but elements like images sometimes benefit from a little more time. Set a delay of up to 30 seconds when you need it, based on the screenshot result.
- Hide cookie banners and Click accept on cookie banners: a set of predefined rules to hide cookie banners and/or click the OK or Accept button that has to be clicked before the page shows.
Advanced settings
The Advanced settings tab has the settings that need some more technical knowledge:
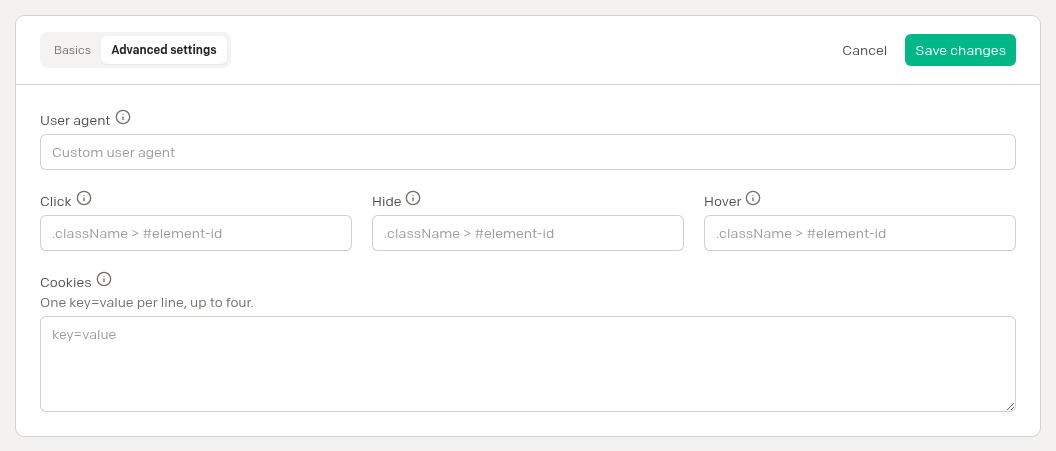
- Click: an element selector that is clicked before the screenshot is taken. For example,
#acceptclicks the element with id="accept". You can even paste a full CSS selector, like.carousel-paginator-list > li:nth-child(4) > button:nth-child(1), copied from your browser's DevTools. Tip: Firefox seems to be the most reliable. More info - Hide: an element selector for elements that should be hidden by setting their style to
display:none !important;. Useful for hiding pop-ups. See "Click" above for more on CSS selectors. More info - Hover: an element selector that is hovered before the screenshot is taken. For example,
#menu2hovers over the element with id="menu2". More info - User agent: the user agent string used to imitate a specific client.
- Cookies: sets a cookie on the request when the URL is loaded, for example
showPopup=false. Put eachkey=valuepair on its own line (up to four cookies). Depending on the website, custom cookies can mimic a logged-in visitor: log in at the website in your browser, copy the relevant cookies and add them here.
For the selectors, type the selector and press Enter to add it.
⚠️ We offer several options to improve the accuracy of your screenshots, but all captures are "as-is". We can't guarantee the result upfront, because the web is so diverse. Always test your best capture settings, review the screenshots in your account regularly, and tweak your settings when needed.